Hi all! Tracy here with this week's tutorial for Papercraft Star. I don't know about you, but I'm always searching the web for new techniques. A while back I created a card with some lattice work on it. It came out okay, but I was really winging it when I put it together. I found a tutorial that showed me a few minor adjustments I could make so I decided to try it again and share a refined version of a lattice work card with you.
For my card I chose to make it a 5 1/2" square card. I cut that from white cardstock and I also cut another square of white at 5 1/2" x 5 1/2". For the front mat I chose a cream colored cardstock and cut it at 5 1/4" x 5 1/4". I placed glue around the outer edges of the cream piece and adhered it to the front of the base card. The white square goes on the inside behind the front panel. It will hide all the edges of the lattice strips.
I placed a little Two-way glue pen on the edges of the white piece and let it get tacky so I could temporarily adhere it to the inside of the card for the die cutting. I used a Cuttlebug and a Nestabilities die and I have to admit it was tough cutting through three layers of paper. I ended up removing the top two layers after they were cut through and replacing the die over the last layer before it would completly cut through. You can avoid that problem by eliminating the mat.
I used a Nestabilities Labels One die and positioned it on top of the three layers, tacking it down with a little tape.
Here's what the pieces look like after cutting. By the time I'd run it through the Cuttlebug so many times the Two Way glue had become permanent and I had a few rough spots on the card base after I separated them. It all gets covered up so no harm no foul.
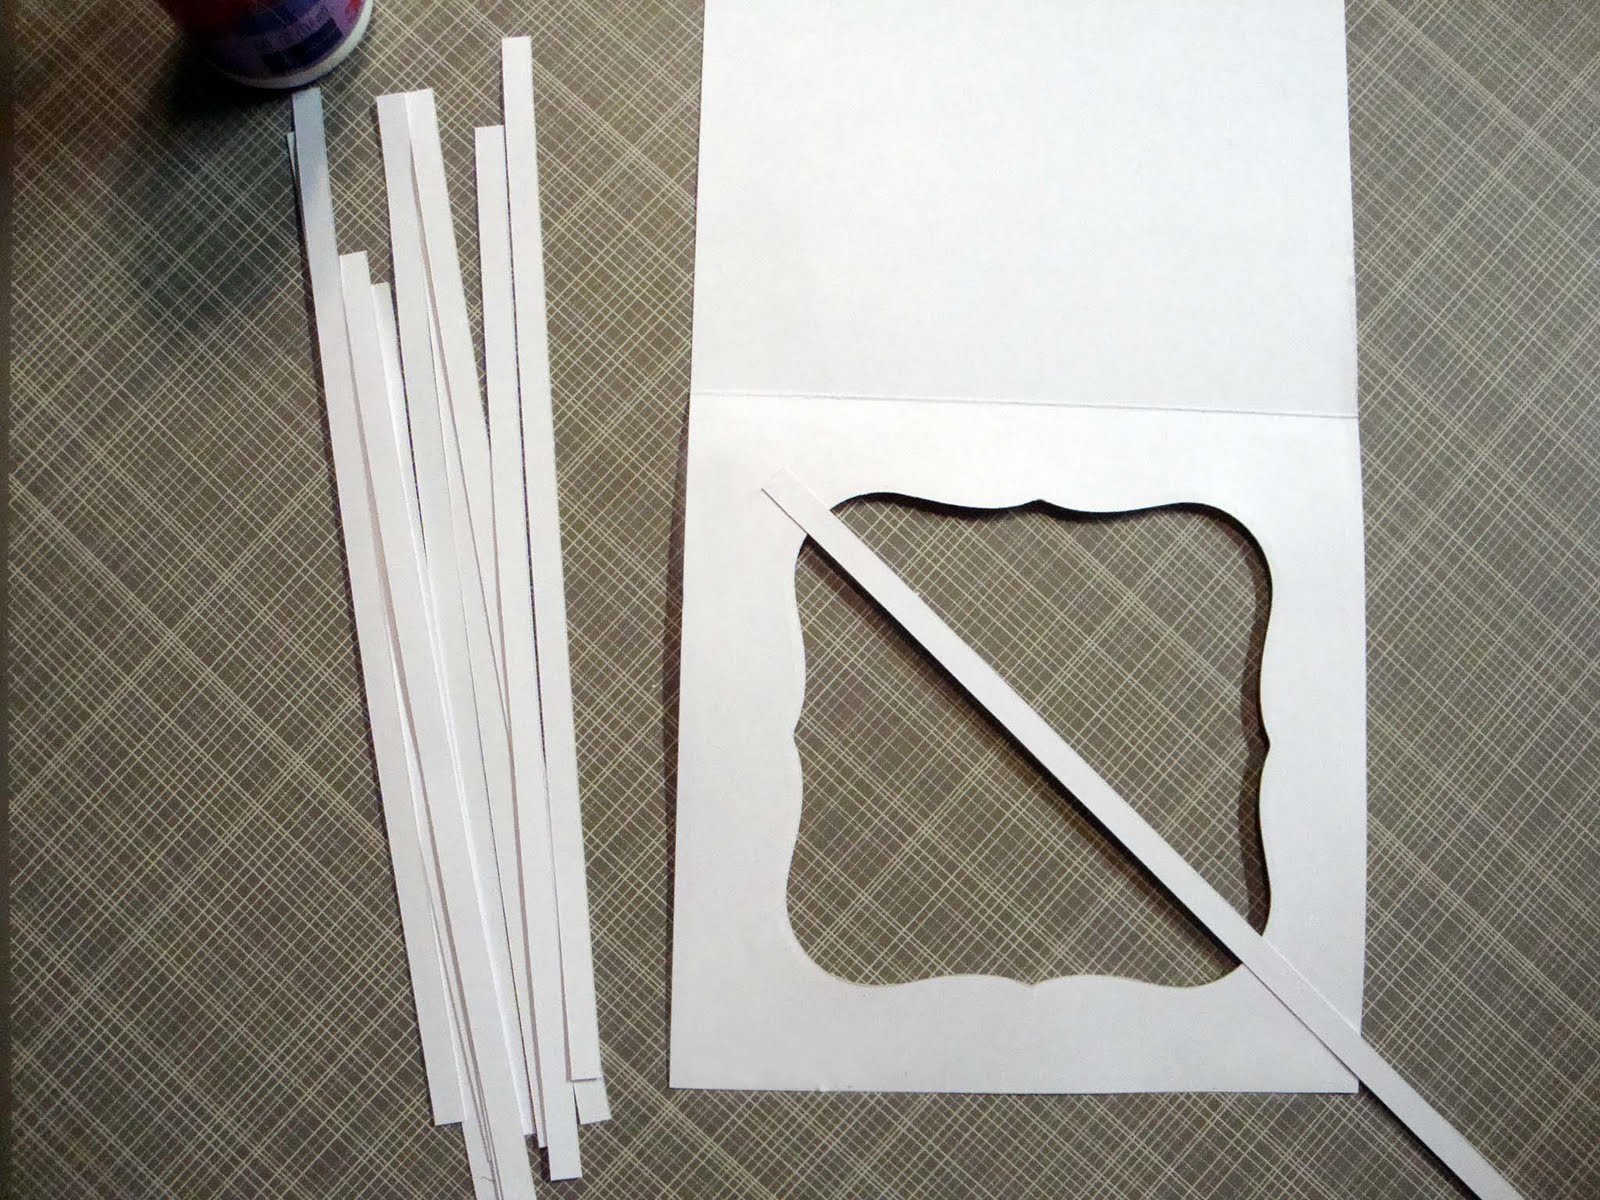
Now you can start weaving your lattice. I cut 1/4" strips of white cardstock. I started in the middle of the shape (by the way you can use any shape you want) and tacked the ends down with a little wet glue.
There is no set spacing or number of rows. I just settled on a random line on my quilting square grid ruler and used that measurement on all the spacing. Go ahead and lay all your strips down for the first direction.
After your first strips are adhered you need to start weaving in the strips going the opposite direction. Make sure you alternate them like I've indicated on the photo.
After you have all your strips adhered, you will adhere the white cardstock square that you die cut to the inside of the front of the card. This covers all those little strip ends.
I ended up adding a cream square cut at 5 1/4' x 5 1/4" behind the lattice work because the backs of all my flowers were visible and I'd used some brads--messy!
Hope you like the tutorial. This is the card I created using this technique.
Happy crafting!
Tomorrow's Executive Reveal comes from Kristina - she always has a treat for us !
Don't forget to link up your submission - entries are open until Sunday, 9 pm Eastern US !!


11 comments:
oh wooohoooooooo,
what a fab idea, thanks for sharing - thing I will try that once a time - it on my 2do *lol
Hugs hellerlittle
Looks great! I will have to try this one! :D
Fabulous tutorial Tracy and will definitely give this is go.
Thanks for sharing.
Fliss xx
Now that's a fun graduation card! Nice and bright and cheery. Great take on this week's photo inspiration. Thaks so much for joining us this week at Papercraft Star!
Yup yup - very cheerful indeed ! Your colors look so crisp - and what fun to use them so unexpectedly as a grad card. I always look forward to seeing what you will bring us next at Papercraft Star !
Beautiful work Tracy! Just Gorgeous!!
Tracy, this is amazing! Thank you so much for sharing this tutorial. I really want to try this, but am a little intimidated because yours looks so lovely!
Super adorable. Love the fun colors. Thanks for playing with us at Papercraft Star.
Your card is wonderful! I am voting for you ;)
great tutorial. thanks for sharing
Wonderful tutorial - thank you so much for sharing your fabulous documentation, and for inspiring me with a gorgeous card!
Post a Comment