Hi everyone - it is Jan here with your weekly tutorial.
Today we are going to make your own hole reinforcement labels. This is so simple, and you can make enough for your lifetime in about 20 minutes !

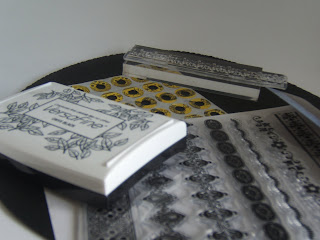
 What you will need are: a package of white reinforcement labels, colored ink, black ink, some fun border stamps (I used a Recollections assortment) and I used a Tim Holtz applicator.
 Shmoosh the colored ink all over the page of labels. You don't have to be precise, as it looks more vintage or artistic if you have some color variation.
 Take your border stamp, and stamp across one row of reinforcers. Vary the stamps all the way down the page.
How easy was that ! I have been using these for quite a while now, and I see that Tim Holtz has just come out with his own variation. Yours will look every bit as good as his, and as unique as you are. Plus, you just spent about 99 cents on 900 labels, wow !
You can use these for mini albums, tags and behind brads.
Be sure you return to us tomorrow for our Executive Reveal - Kristina is up this week, and she always has something special and fun for us all !


8 comments:
neat idea - will try sometime!
Awesome idea, thanks for sharing!
Brilliant idea, Jan! I will have to give it a try!
Just found this blog and wow what have I been missing. Fabulopus tip re reinforcement rings so must have a go at this very soon, Sheila:)X
Fantastic idea, thanks so much for sharing.
Betty x x
Why didn't I think of this! I think I have some of these laying around. I want to find them and use them to make some fun border patterns for my projects. Now where did I put them? Hmmmm......
Hi Jan,
I live in The Netherlands and i'am not know the reinforcemnt labels.
Where cann I buy them online (if possible fo $ 0,99 ;-) )
I hope to here from you.
Thanks, Iris
Sorry, I don't know where to get them on line. Here in the US they are available at every office supply store, drugstores, and chain department stores.
Post a Comment